Technical Specification Guide
Architectural & Interior Design Specification Guide
MK02 Technical & Project Planning Edition
MK02 Technical & Project Planning Edition
This document provides design, technical and coordination guidance for incorporating Wall Envy MK02 direct-to-wall printing into architectural and interior projects.
It is intended for architects, interior designers, builders and project teams specifying direct-to-wall printing in commercial, residential, healthcare, education, hospitality and recreation environments.
Final substrate suitability, machine access and printable area are confirmed following site assessment and final site measure.
Direct-to-wall printing is seamless within the printable area, but it is not seamless within the printable area .
The MK02 requires operating clearances from floors, ceilings, corners and the machine-body side of the wall.
These zones should be allowed for in elevations, artwork development, joinery coordination and project planning from the outset.
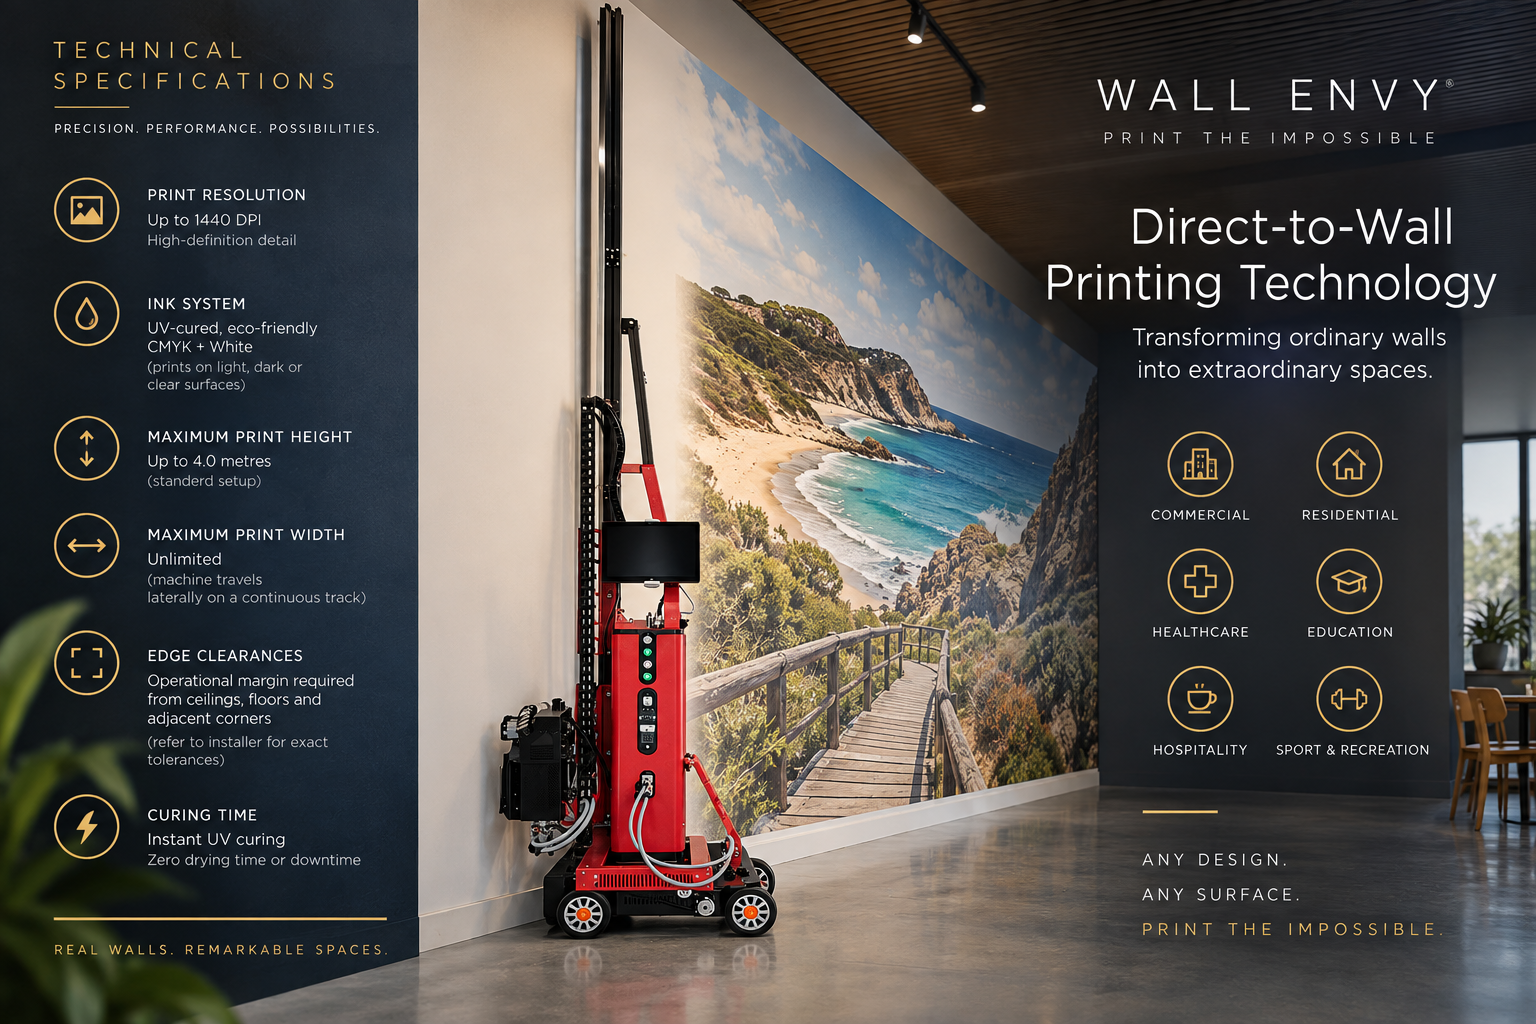
Wall Envy uses the MK02 vertical-track direct-to-wall printer to apply UV-cured CMYK + White ink directly to suitable architectural surfaces.
The print is produced directly on the wall or substrate, without wallpaper panels, adhesive vinyl or a separate film layer. The result is a continuous graphic within the machine's printable zone, with no panel joins or wallpaper seams.
The printer travels laterally along a floor track while the printhead moves vertically on the mast.
UV curing occurs during printing, eliminating conventional drying periods after printing is complete.
White ink allows opaque elements to be printed over suitable dark or clear surfaces where artwork and substrate conditions require it.
Laser and distance sensing helps maintain printhead stand-off across minor surface variation. It does not make severely uneven or obstructed surfaces suitable for printing.
| Equipment | MK02 Vertical-Track Direct-to-Wall Printer |
| Print Resolution | High-definition printing up to 1440 DPI |
| Ink System | UV-Cured CMYK + White |
| Maximum Print Height | Up to 4.0 metres in standard vertical-track setup, subject to site conditions |
| Print Width | Continuous lateral travel across suitable wall lengths. Practical width depends on wall length, floor conditions, access and operating requirements. |
| Curing | UV-Cured During Printing |
| Print Direction | Normally left-to-right. Right-to-left printing is possible, however right-side machine clearance remains required. |
The values below are the current planning allowances supplied for the MK02. Treat them as approximate design clearances until confirmed by Wall Envy during final site measurement.
| Location | Planning Clearance | Design Note |
|---|---|---|
| Top / Ceiling | Approx. 350 mm | Leave an unprinted border below the ceiling or overhead obstruction. |
| Bottom - No Floor Rail | Approx. 350 mm | Measured from finished floor level. |
| Bottom - With Floor Rail | Approx. 450 mm | Allow larger bottom margin where floor-rail configuration is used. |
| Left Side | Approx. 100 mm | Clearance at the printhead side of the system. |
| Right Side | Approx. 700 mm | Required for the main machine body and control box. This clearance remains even when printing direction is reversed. |
Printable areas must be flat enough for the printer to track safely and must remain unobstructed.
Do not design through pipes, conduits, wall-mounted fixtures, switches, power points, signage hardware, handrails or other protrusions.
The printer does not wrap around internal or external corners.
Maintain a clear unprinted border at adjoining walls and corners.
Doorways, windows and other openings must be treated as separate no-print zones.
Final artwork dimensions should only be locked after Wall Envy confirms the usable print zone onsite.
Think of the wall as a printable rectangle inside the architectural wall.
The graphic sits within that rectangle rather than running fully into every edge, corner, floor junction or ceiling junction.
The MK02 can print on a wide range of porous and non-porous architectural surfaces, subject to surface condition, adhesion and site suitability.
Gyprock / Plasterboard
Painted Plaster
Rendered Concrete
Raw Brick
(subject to texture)
Timber & Plywood
MDF & Paper-Faced Boards
Glass
Architectural Metal
Ceramic Tile
Acrylic Panels
Other Sealed Surfaces Subject
To Compatibility Testing
The substrate must be clean, dry, structurally sound and free of loose paint, dust, grease, silicone residue and flaking coatings.
Walls should be complete and painted before printing unless Wall Envy advises otherwise.
Highly porous, glossy, dark or unusual surfaces may require primers, base coats or testing.
Fresh coatings must be fully cured in accordance with manufacturer guidelines.
Finished floors should provide a stable and reasonably level machine path.
Supply high-resolution artwork at the largest practical size. Vector artwork is preferred for logos, typography and linework.
Allow for all confirmed no-print margins, openings and obstructions in final layouts.
Digital mock-ups are used for scale and placement approval. Colour appearance can vary depending on wall colour, texture and lighting.
For critical brand colours or unusual substrates, specify a sample or test print prior to final approval.
| Environment | Typical Supplier Guidance | Key Variables |
|---|---|---|
| Interior | Approx. 8-10 Years | Substrate, wall preparation, cleaning, abrasion and UV exposure. |
| Exterior | Approx. 3-5 Years | Direct sun, weather exposure, substrate, orientation and local conditions. |
| Protective Coating | May Extend Service Life | Compatible clear varnish may be considered where additional protection is required. |
These are general supplier-life estimates and should not be interpreted as project warranties.
Actual longevity depends on wall system design, environment, substrate condition, exposure and intended use.
Exterior installations and high-contact interior environments should always be assessed individually.
Use soft, non-abrasive cleaning methods.
Avoid aggressive solvents, scouring pads and repeated hard abrasion unless compatibility has been confirmed.
In high-contact, hospitality, education or exterior environments, discuss whether a compatible protective clear varnish is suitable for the project.
Damage to underlying coatings or substrates may affect the printed finish.
For projects
Coordinate services so the intended print zone remains as clear as possible.
Confirm substrate, wall finish, floor level and access requirements.
Finish wall linings, sanding, stopping and painting.
Confirm actual printable area and operating clearances.
Finalise artwork scale, positioning and exclusions.
Print prior to installation of wall-mounted fixtures wherever practical.
Install fixtures and protect completed wall using approved methods.
Nominate the intended feature wall and target graphic dimensions. Keep services, switches, outlets, pipes, rails and mounted equipment outside the print zone where possible. Allow MK02 top, bottom, left and right clearances in elevations and joinery coordination. Confirm stable machine access and operating room. Specify a clean, dry and stable wall finish suitable for printing. Avoid relying on artwork wrapping around corners. Allow for final site measure after construction. Coordinate wall-mounted fixtures after printing wherever practical.
Wall Envy provides site measures, design consultation,
scale validation and digital mock-ups for suitable projects
across the Central Coast, Newcastle and Hunter regions.
Early involvement is encouraged so printable wall zones,
clearances and service locations can be coordinated before
construction is complete.
This guide is intended for design coordination and
preliminary specification.
Machine clearances and performance values are based on
current MK02 information and may vary with equipment
configuration, substrate condition, floor level,
wall geometry and site access.
Final printable area and suitability must always be
confirmed by Wall Envy before artwork is released
for production.
Coordinate printable wall areas, access requirements,
clearances and service locations before construction
is complete.
Recommended Project Sequencing
1
Nominate Feature Wall
2
Confirm Conditions
3
Complete Wall Finishes
4
Site Measure
5
Artwork Approval
6
Printing
7
Protection & Handover
Section 04
Architectural Coordination & Specification
Early Coordination Checklist
Consultation & Prototyping
Technical Note
Architects • Designers • Builders
Specify The Wall Early.
Design The Printable Zone.
Print The Impossible.